Spring Blossom Watercolour Tutorial
This vibrant pink and white blossom, combined with the shadows across the road on a bright spring morning, makes an inspiring and colourful subject to celebrate spring.
Materials Used
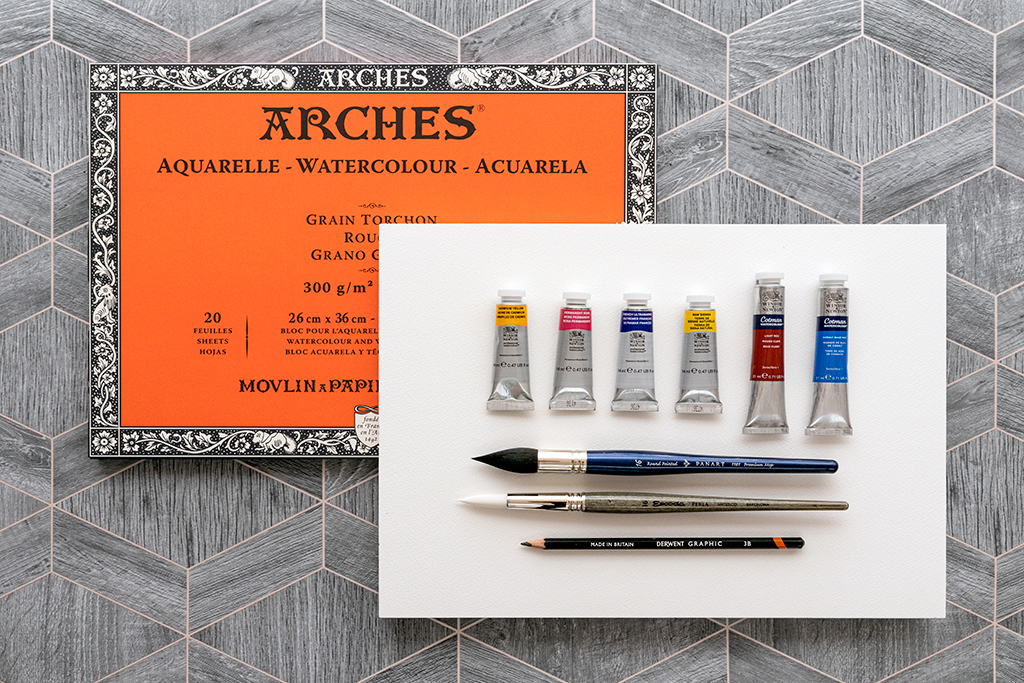
Colours used were a combination of both professional and Cotman paints, as I prefer some of the subtle colour differences between brands. Mix and match as you prefer.
- Winsor & Newton Professional Watercolours
- Raw Sienna
- Cadmium Yellow
- Permanent Rose
- French Ultramarine
- Winsor & Newton Cotman Watercolours
- Light Red
- Cobalt Blue
- Arches 140lb (300gsm) Rough 10″ x 14″ Watercolour Paper Block
- Panart Series 1181 Synthetic Squirrel Mop Size 16 (for all preliminary washes in step 1)
- Escoda Perla Round Size 16 (for all other work)
Click the link to download a free printable sketch and use Transfer Paper to trace it onto your watercolour paper.
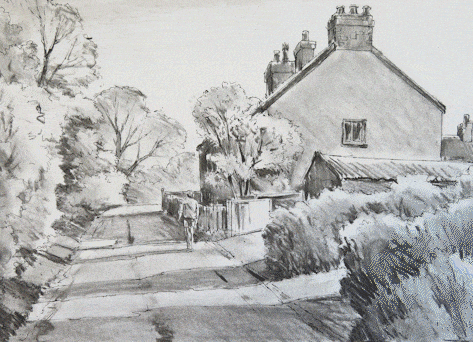
Tonal Sketch
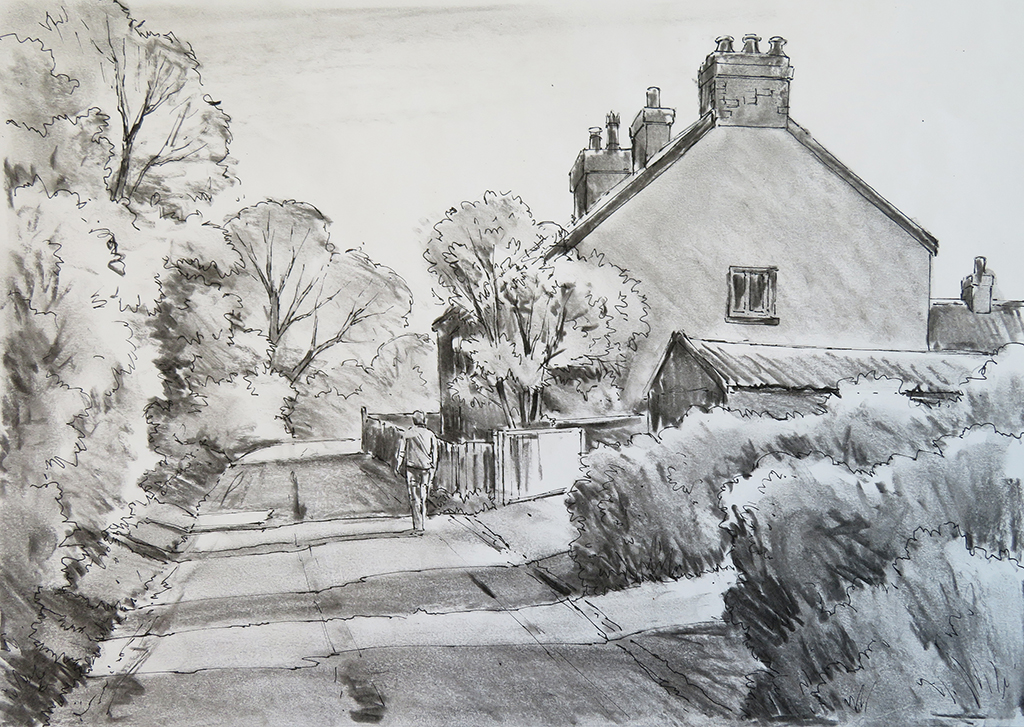
The tonal sketch is an important part of my working process. I explore the subject’s potential and pitfalls by drawing it in black and white first. Because watercolour is difficult to correct or change direction during the painting, this initial planning stage helps me check my composition, assess the pattern of light and dark and decide which details to include. ‘Fail to plan, plan to fail’ is a good motto to remember!
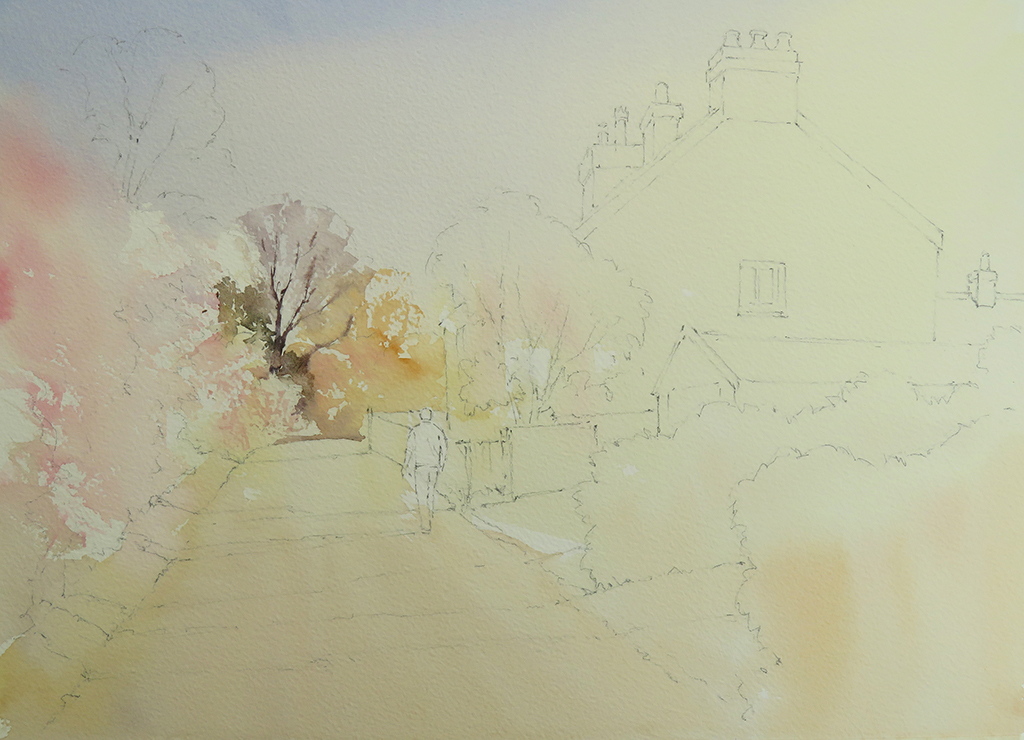
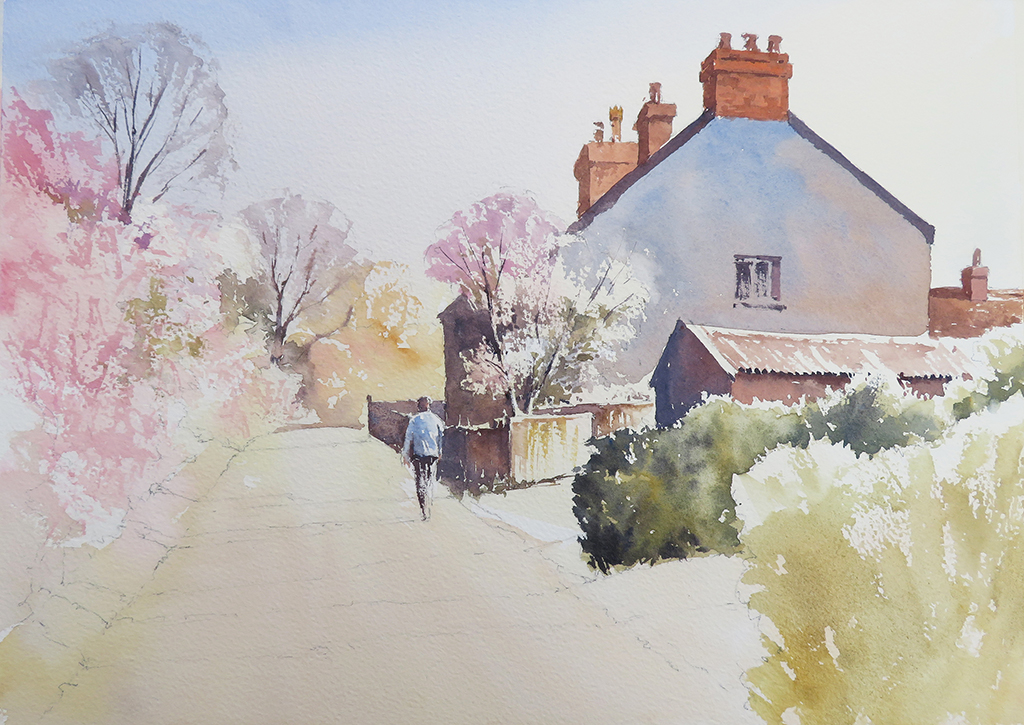
Step 1

I carefully drew the composition onto the watercolour paper with a 2B pencil. I then wet the paper all over to help the first washes flow easily and create soft edges, apart from the figure walking on the road and a few areas on the left, where I wished to create some texture for the blossom.
Starting with the sky, I added a pale wash of Raw Sienna on the right, as this is where the sun is shining from. This also went across the cottages, foreground hedges and road. While this wash was still very wet, I added a touch of Permanent Rose in the sky towards the left, followed by French Ultramarine Blue. The addition of a little pink in the sky wash helps the transition from the Raw Sienna to the blue, without creating green.
Finally, I added a pale wash of Permanent Rose to establish the lightest areas of the blossom on the left, creating soft edges against the sky, but also a little texture by dry brushing over the areas of paper I had left dry.
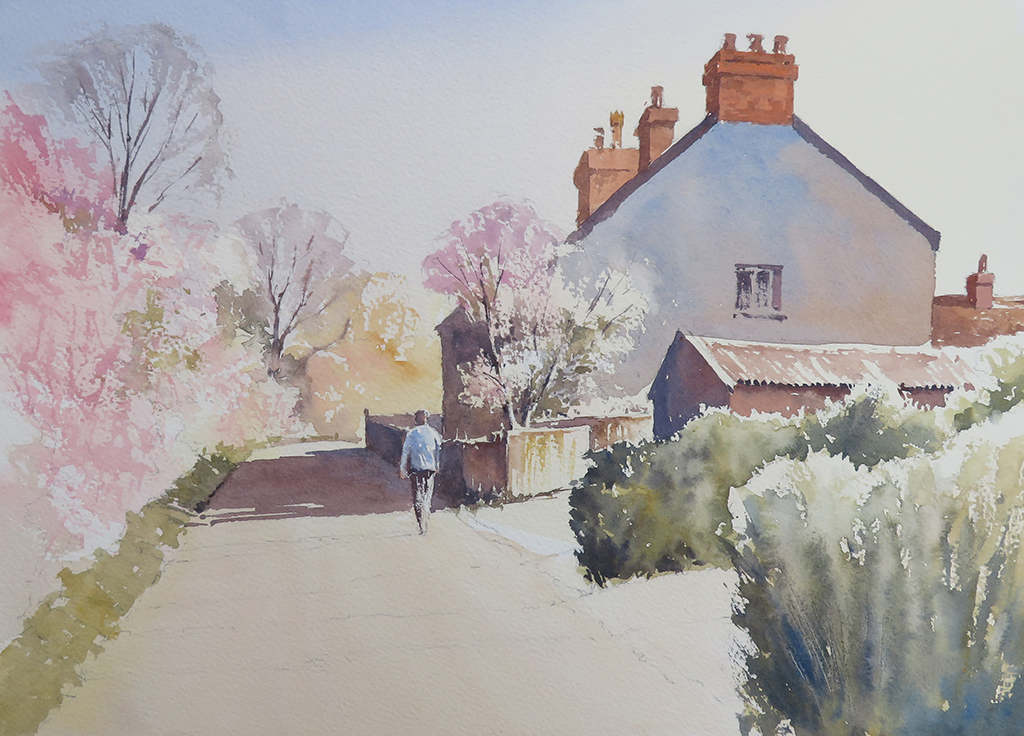
Step 2
Once everything was dry, I added the distant trees. Dry brushstrokes were used throughout to create broken edges. I used Raw Sienna and a little Light Red for the bushes on the right, adding a touch of French Ultramarine to create a green for the darker foliage on the left. The trunk and branches of the tree were painted with a thicker mix of French Ultramarine and Light Red, while the fine twigs at the top were a dilute wash of the same mix.
Step 3
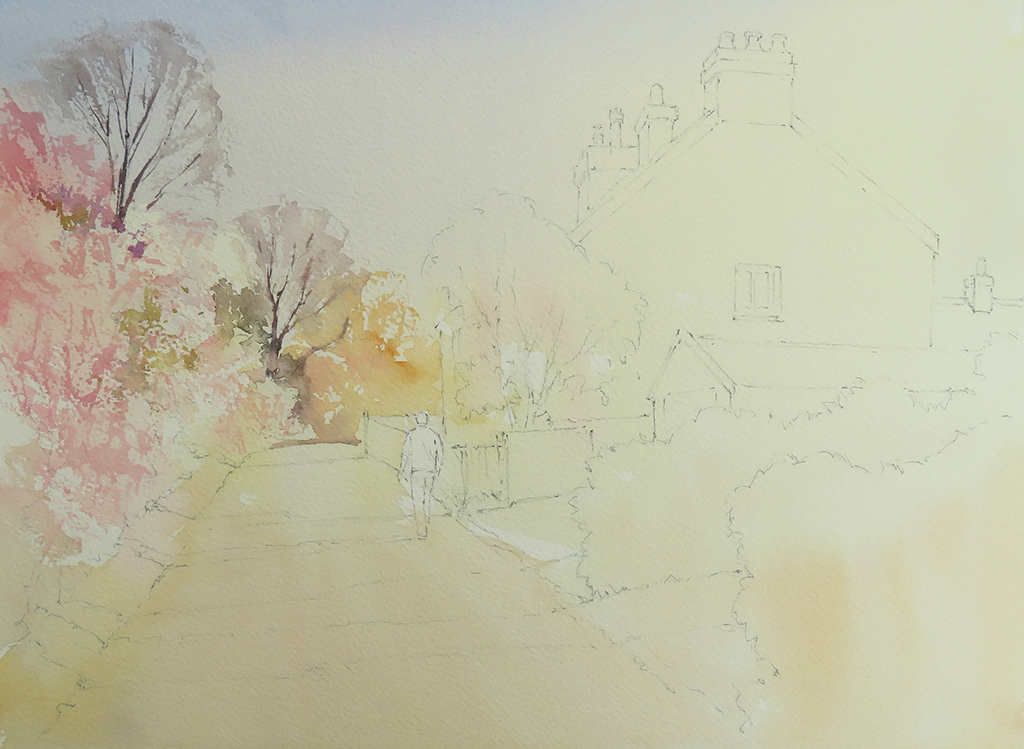
The tree (top left) was painted with the same colours and techniques as the distant one. I then developed the blossom by lightly dry brushing a wash of Permanent Rose over the pale underpainting, adding more Rose and a little French Ultramarine to darken it for the shadows at the top. I also added a touch of green here and there to suggest leaves showing through, by mixing the blue with Cadmium Yellow.
Step 4
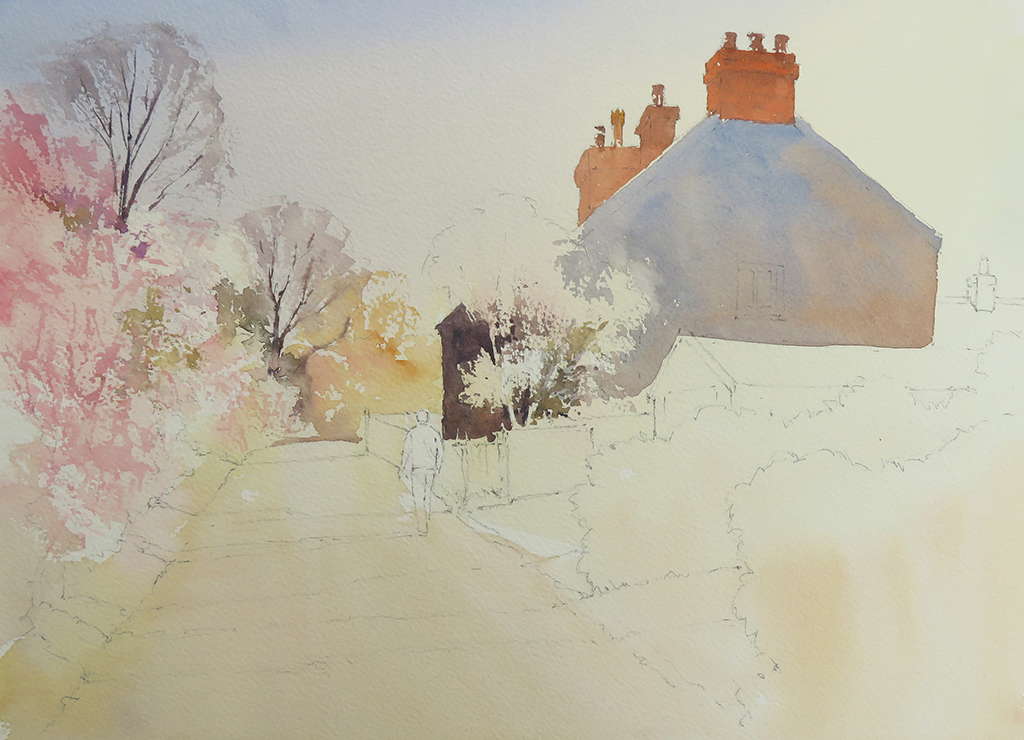
I next blocked in the main shapes of the cottages on the right. Light Red was used for the chimney stacks, adding a little French Ultramarine to darken it where required. The end wall was painted with a mix of Cobalt Blue and Light Red, allowing the red to get stronger on the right.
The wall on the left was the same mix but much darker. Note how I was careful to paint around the blossom on the tree growing in front of these walls, using dry brushstrokes to suggest the tiny flowers.

Step 5

Once this was dry, I added the shadows to the chimneys using a darker mix of Light Red and French Ultramarine. The edges of the roof and window were painted with the same mix, but adding more blue than red. The distant roof on the far right was added with mixes of the same 2 colours. The blossom growing in front of the cottage was finished with more dry brushing, using Permanent Rose and a touch of green. I added the twigs with a dark mix of French Ultramarine and Light Red as before.
Step 6
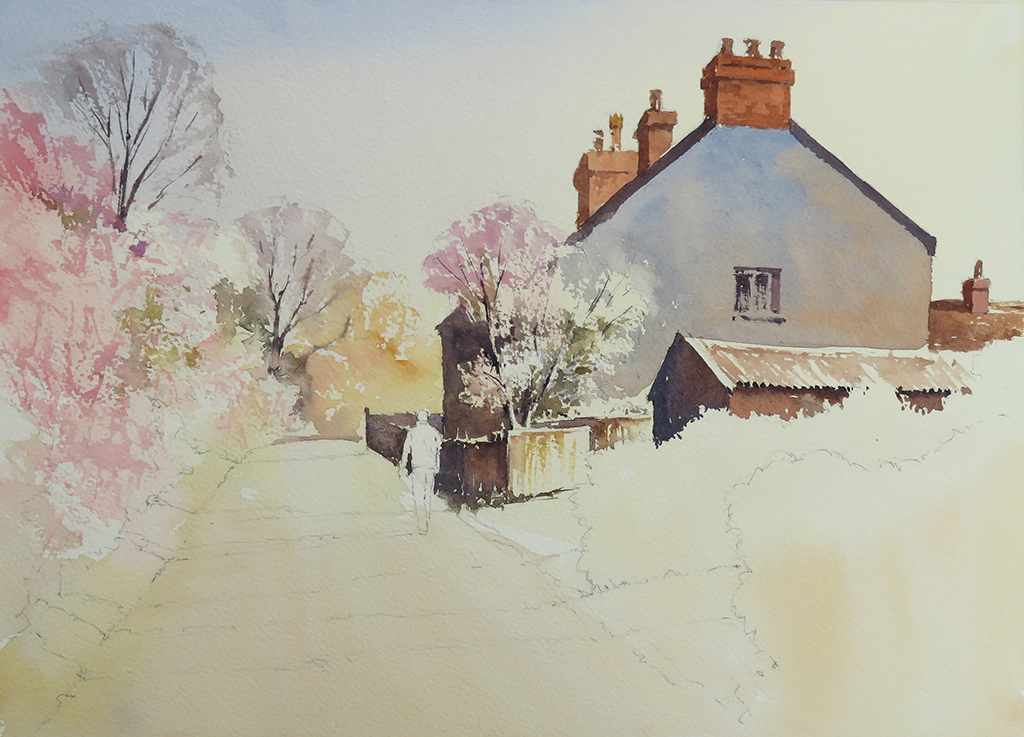
I next painted the shed and fencing in front of the cottages. This was mainly Light Red and French Ultramarine, adding more blue to darken the mix for the shadows. A dry brushstroke of Raw Sienna was used for the sunlit gate. Note how I was careful to paint the dark fencing around the walking figure.
Step 7
I then detailed the figure using Light Red for the head, adding a little French Ultramarine to darken the left hand side. I used Cobalt Blue for the torso and a dark mix of French Ultramarine and Light Red for the legs, using dry brush strokes to suggest movement.
The hedges in front of the shed came next, working wet in wet to create soft shadows. I started with a mid tone green mixed with Raw Sienna, a little Cadmium Yellow and a touch of French Ultramarine, using drybrush strokes to create the texture of the foliage. While this was wet, I added the darker shadows with the same mix, only much thicker. For the deepest shadows at the base of the hedges I added more blue and a little Light Red.
Step 8
I painted the grass along the roadside on the left with Raw Sienna, a little Cadmium Yellow and a touch of French Ultramarine. This in turn helped to create definition with the blossom above.
The final stage was to paint the shadows falling across the road and blossom on the left. This is an important feature of the painting as it enhances the effect of the sunlight and also describes the contours of the grass verge.
I started with the shadow being cast by the cottages, using Cobalt Blue and Light Red for the area on the road, then changed to a darker green where it falls across the grass along the roadside. Note how this shadow helps define the sunlit figure and describes the contours of the grass verge.
Step 9
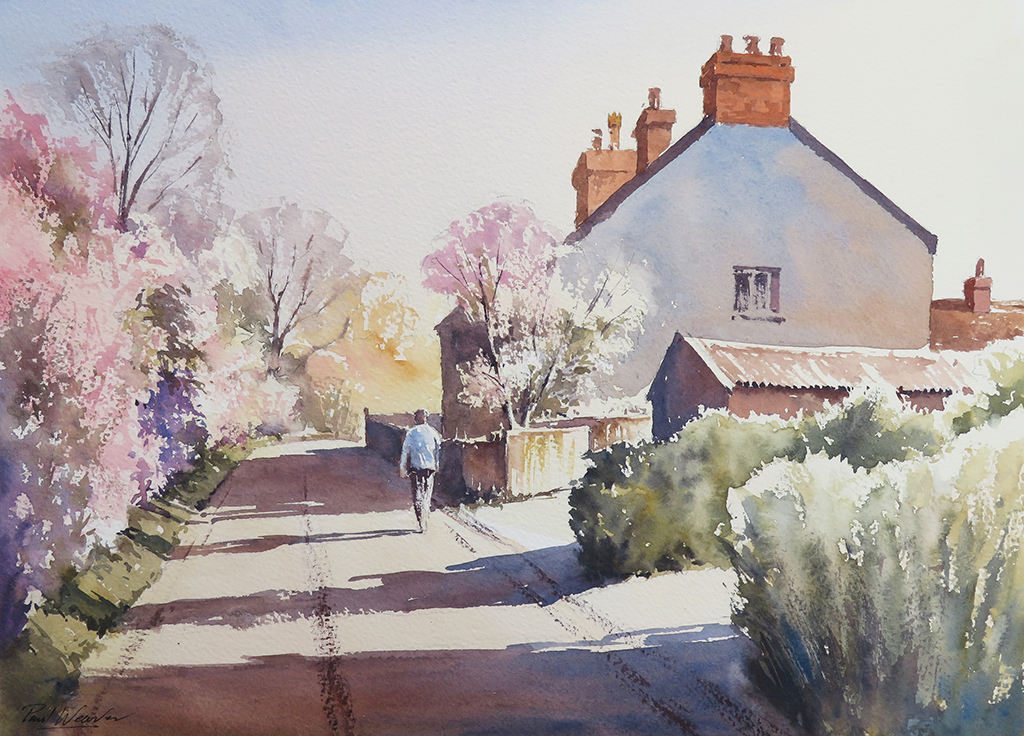
I repeated the process for the shadows being cast by the figure and the two hedges on the right. I made the shadows darker and more blue to start with as the shade was deeper here, then added more red to the mix as the shadow travels towards the left.
Changing the shadows’ colour according to the surface they fall across is important, as shadows are transparent. I therefore changed the wash to a darker green where the shadow falls over the grass, then to a deeper purple colour on the blossom, using Permanent Rose and a touch of French Ultramarine and adding a touch of green for foliage here and there.
Finally, I added a few dark dry brushstrokes of Light Red and French Ultramarine along the road to suggest ruts and tyre marks. Note how these taper and get narrower as they recede, which creates depth and also leads the eye into the scene.
All work ©2025 Paul Weaver